As a pre-requirement make sure you have a project on UCloud with allocation of CPU and GPU resources on AAU. If this is not the case, please contact your local Front Office, for example by sending an email to escience@ruc.dk. Make sure that your data does not contain user sensitive information, AAU does not have the same certification as SDU datacenter. The HW configurations from AAU are described below (per single node):
GPU Nvidia T4 [1, 2, 4] units
CPU [10, 20, 30, 40] virtual cores
RAM [40, 80, 120, 160] GB
Up to date details about the resources can be found on https://cloud.sdu.dk/app/skus
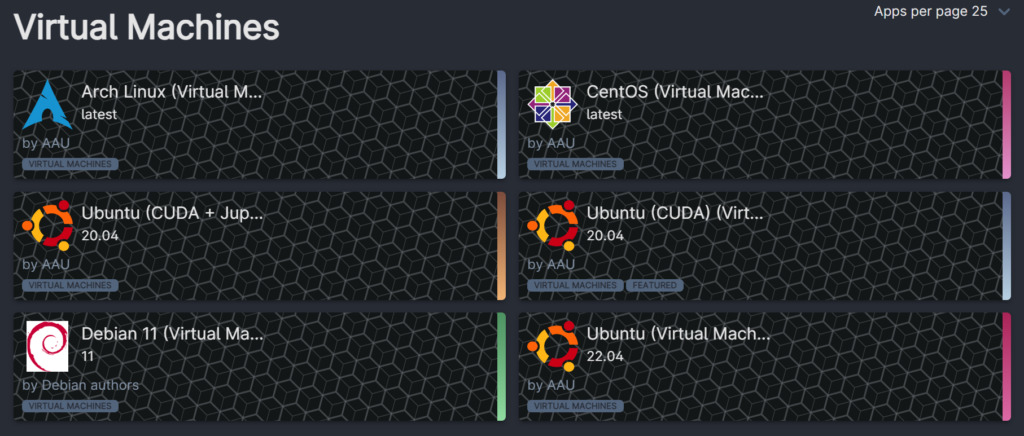
Virtual Machine (VM)
The VM is an isolated environment, which gives users full root access and therefore the environment can be highly customized. The current selection of VMs on UCloud contains the following systems and more to come in future.
Generate SSH keys
This step takes place on your local machine (laptop/desktop). In order to access the VM it is necessary to create Secure Shell Protocol (SSH) keys more specifically a public key (shareable part) and a private key (kept safe locally).
Make sure that a package called openssh-client in stalled, in case of a Debian/Ubuntu distributions it would be the following command:
sudo apt install openssh-clientThis package contains ssh client and ssh-keygen command, which generates the keys. The following command triggers a procedure requesting an additional user input (the explanation of using more advanced keys is here). It is recommended to define a passphrase:
ssh-keygen -t ed25519 -a 100 -C "your_email@example.com"The generated SSH keys will be by stored under ~/.ssh/ by default.
Start VM and adjust environment
The VM has to be defined similarly to any other job on UCloud. Job name and machine type shall be filled as well as the public key, which is in this case a mandatory parameter.
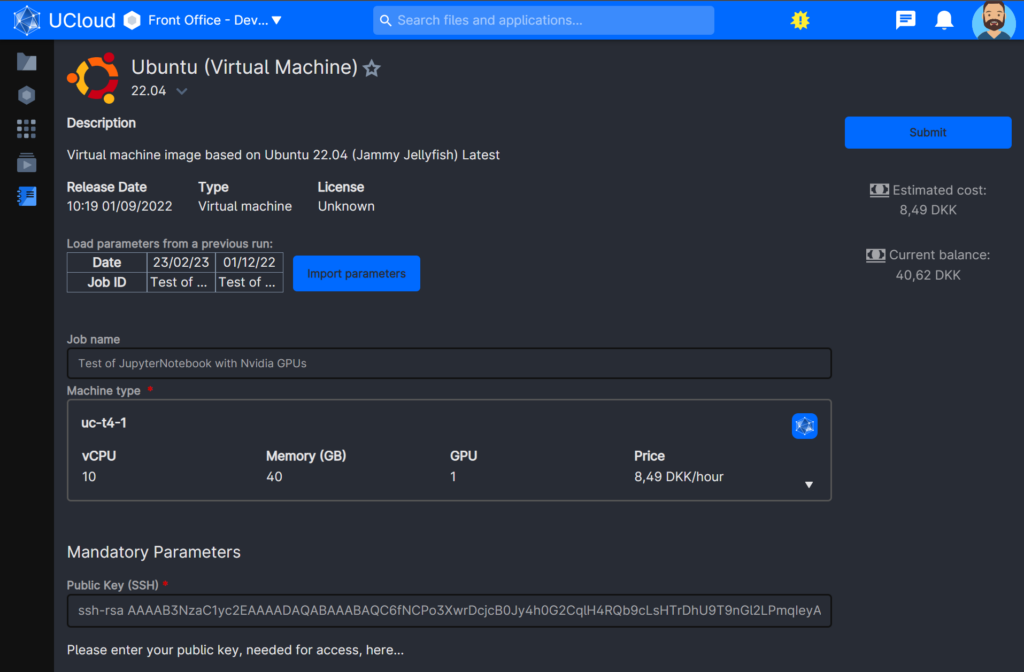
The following command prints the public key in a terminal (the private shall not be shared):
cat ~/.ssh/id_ed25519.pubAfterwards the content of the public key can be copy pasted to the input field called “Public Key (SSH)” on a job definition page from above.
Establish SSH secured connection with the VM
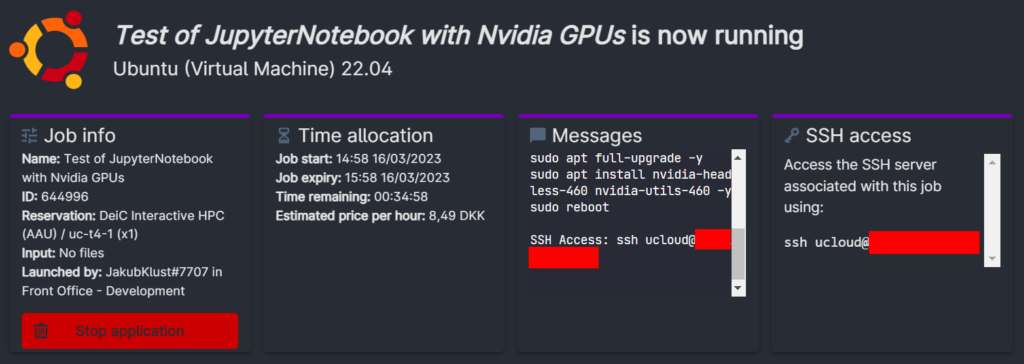
The VM is only accessible by a public IP address pointing to the VM with running SSH service. In previous steps we installed the open-ssh client on the local machine, which is required for this step. The secured shell allows user to modify a remote environment and use a port forwarding of services like jupyter-notebook to the local machine.
The secured shell can be established by this commend:
ssh -i ~/.ssh/id_ed25519 ucloud@IP_address_from_the_red_markNote: there is a short delay of ~15 seconds, so in case of getting: “ssh: connect to host IP port 22: Connection refused” try again later and accept the connection by typing “yes”.
Adjusting VM’s environment
# Update of system packages
sudo apt update
sudo apt full-upgrade -y
# Installation of Nvidia drivers
sudo apt install nvidia-headless-535 nvidia-utils-535 -y
# Reboot VM
sudo reboot
Note: leave default settings and confirm them in case of pop-ups during update
The VM restarts and therefore it close SSH connection, it requires a re-login to the VM after ~15 seconds (by revisiting the section above). The following commands need to be executed afterwards:
# Installation of Docker
curl -fsSL https://get.docker.com -o get-docker.sh
sudo sh get-docker.sh

# Installation of Nvidia Docker support
distribution=$(. /etc/os-release;echo $ID$VERSION_ID) \
	  && curl -fsSL https://nvidia.github.io/libnvidia-container/gpgkey | sudo gpg --dearmor -o /usr/share/keyrings/nvidia-container-toolkit-keyring.gpg \
	  && curl -s -L https://nvidia.github.io/libnvidia-container/$distribution/libnvidia-container.list | \
			sed 's#deb https://#deb [signed-by=/usr/share/keyrings/nvidia-container-toolkit-keyring.gpg] https://#g' | \
			sudo tee /etc/apt/sources.list.d/nvidia-container-toolkit.list
sudo apt update
sudo apt install -y nvidia-container-toolkit
sudo nvidia-ctk runtime configure --runtime=docker

# Add user to Docker group
sudo usermod -aG docker ucloud

# Restarting Docker service to reload newly installed components
sudo service docker restart

# Testing support of Nvidia with Docker images
sudo docker run --rm --gpus all nvidia/cuda:12.1.0-base-ubuntu22.04 nvidia-smi
sudo docker run --rm --gpus all -it tensorflow/tensorflow:latest-gpu python -c "import tensorflow as tf;tf.test.gpu_device_name()"

# Select version of a tensoflow docker container from: https://hub.docker.com/r/tensorflow/tensorflow
# On remote VM run the following command to enable the latest docker container with tensorflow, jupyter and GPU support
sudo docker run -p 8888:8888 --rm --gpus 0 tensorflow/tensorflow:latest-gpu-jupyter

# The output shows how to connect to the jupyter session
# 127.0.0.1://... (copy a link to the session starting with 127.0.0.1...)
As far as the shell runs the jupyter-notebook will be accessible.
Establish a port forwarding from the local machine to the VM
The jupyter-notebook uses port 8888 (so make sure that you do not run a local instance of jupyter on the same port) to provide access to the main user interface (as a webpage). In order to create a secured tunnel with SSH for port 8888 execute the following command in a new terminal session:
ssh -L 8888:localhost:8888 ucloud@IP_address_from_the_red_marks
# enter password for your SSH key
Start a web browser locally and paste the URL including the session id from VM (copied from VM’s terminal after executing jupyter). The jupyter-notebook presents itself by a loading animation and a full potential of GPUs on HPC cluster is available now.
Copy data from a local machine to the VM and vice versa
It is convenient to use the jupyter-notebook build in functionality to upload files. Otherwise this section shows how to copy a large amount of data from the local machine to the VM.
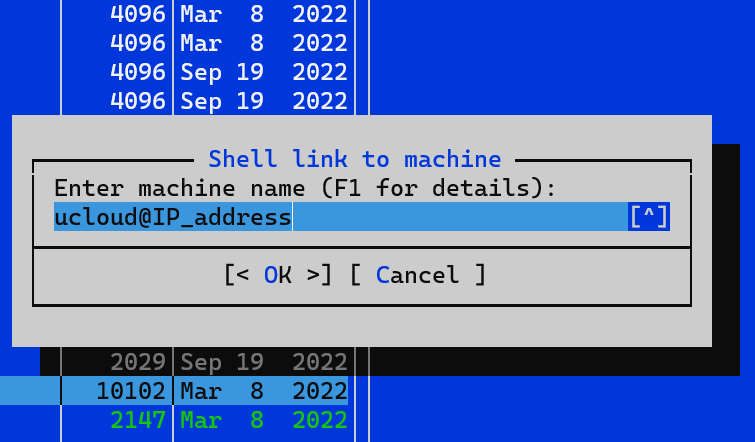
For this purpose it is suggested to use a GNU Midnight Commander or a simple scp command. Keep in mind that the analyzed data set needs to be copied from the VM before it is going to be stopped, otherwise the data will be lost.
# on your local machine
# update database of packages and install Midnight Commander
sudo apt update && apt install -y mc
# start Midnight Commander
mc
The password will be requested in a next step and a content of the VM will appear on the right panel. It is also possible to learn more about Midnight Commander on project’s official page or the following YouTube video.
When the data is uploaded to VM it makes it possible to continue the already established ssh connection and perform processing of data in a remote terminal or in the jupyter-notebook.
Clone and update project from GitHub/GitLab repository
In case you prefer to utilize your own repository, it is possible to clone the content of your repository to the home directory of the default ucloud user and consequently the files will be listed under the jupyter-notebook.